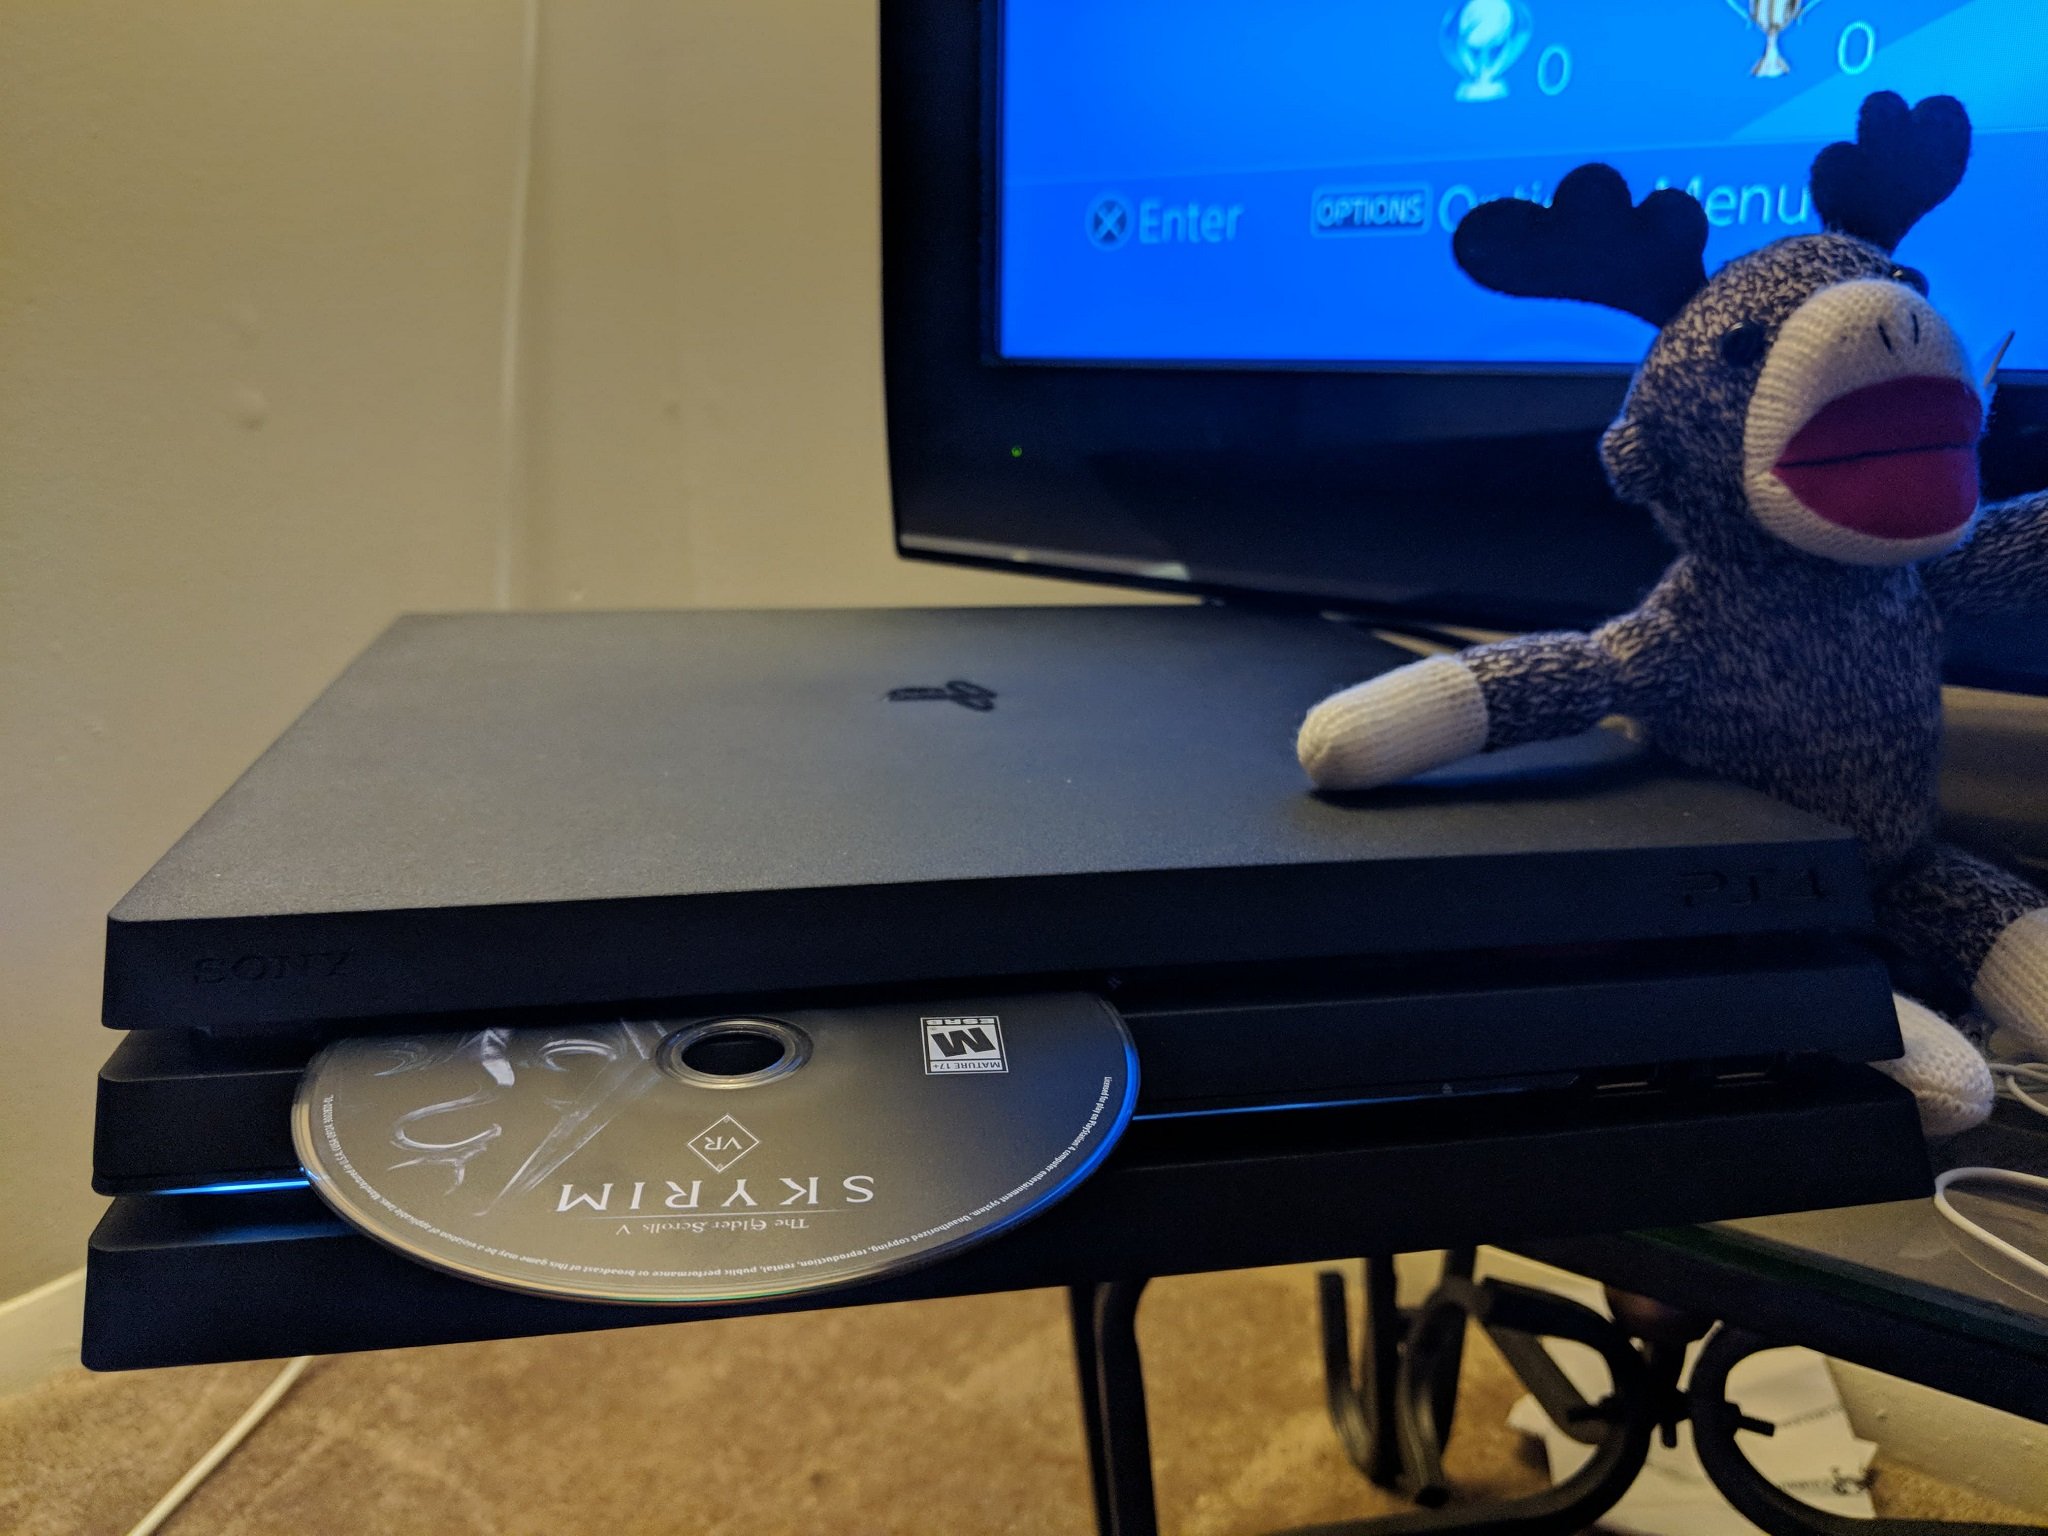
Best answer: There are several things that you can do when your PS4 won't accept a disc, but some of the most common causes may be the easiest to fix. Either simply clean your disc with a microfiber cloth or attempt to restart your console from safe mode.
- Amazon: Microfiber cloth 6-pack ($9)
How will I know what's wrong?
You generally won't know exactly what the problem is until you go through a few steps to fix it first.
If your PlayStation 4 won't accept a disc, there could be a myriad of factors involved, both on the hardware and software front. Whether it's the former or the latter plaguing you with problems, you can fix it yourself either way… to an extent. I wouldn't recommend completely gutting your PlayStation 4, but there are ways to take it apart and make minor adjustments that could prove to be the solution if cleaning your disc or restarting the console doesn't work.
Check if a disc is already in your PS4
You'd be surprised at how many people don't tend to think of this one because it's just so easy to gloss over. If your PS4 isn't accepting a disc, it may be because a disc is already in it that you have forgotten about, or one was placed in there without your knowledge. If this is the case, eject that disc first. And if it doesn't eject, you'll need to use the manual eject screw like a few of the steps below.
Clean the disc
This sounds like a no-brainer, but you should carefully clean the disc. While at first glance a disc may seem fine if you're checking it quickly, it could still need a quick polish to get rid of some superficial scratches or dust. Try rubbing it down with a dry microfiber cloth and also check that there are no small cracks on the disc that may be hard to see.
You should not use a liquid cleaning agent as you are wiping it down.
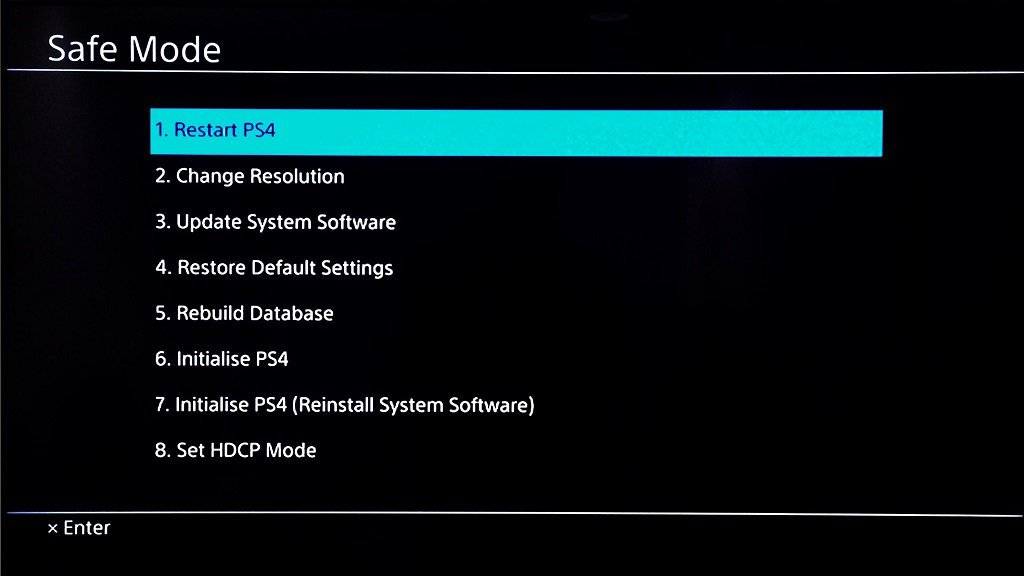
Restart and update from Safe Mode
- To begin this step, make sure your PlayStation 4 is completely powered off and not just in Rest Mode.
- Once off, press and hold the power button for several seconds.
- You'll hear an initial beep and then another beep after 7 seconds. Release the button after the second beep.
- Connect your DualShock 4 controller to the console using your USB charging cable as instructed.
- From here you'll see a black screen with listed options to choose from. Either choose the first: Restart PS4, or the third: Update System Software.
Your console should boot up as normal after this.
Tighten manual eject screw
Note: This requires you to unplug every cable from your PS4.
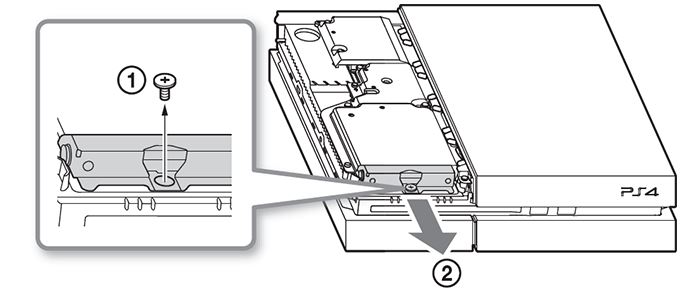
No matter what model console you're playing on, be it the original PS4, the PS4 Slim, or a PS4 Pro, each has a manual eject screw associated with the disc drive should problems arise and your disc gets stuck. Sony thankfully has diagrams showing exactly how to tighten this screw, which conveniently also tends to solve the issue of your PS4 not accepting a disc to begin with.
Original PS4 Model
If you purchased your PS4 between 2013 and the middle of 2015, you likely have either a CUH-1000 Series model or CUH-1110 Series model.
-
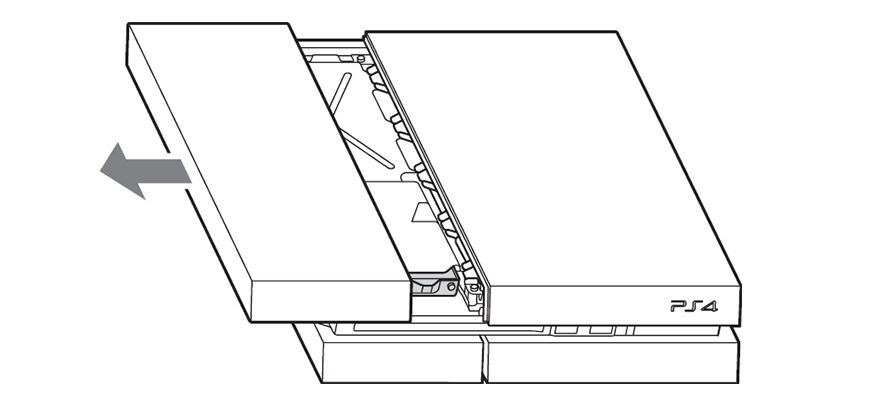
Gently slide off the left HDD bay cover panel as seen below.
-
You will now see two sets of vents. From the front, follow these vents until you come across a slot that is not grouped with any other slots. This is where the screw will be. (Use a flashlight if needed).
-
Once located, tighten the screw as needed.
- Place the HDD panel back on and plug in your console.
PS4 CUH-1200 Model
From mid-2015 to around September 2016, anyone buying a PS4 likely picked up the PS4 CUH-1200 Series.
- Like the above steps, start by removing the HDD cover bay. Using your fingers as leverage, apply even pressure near the seam to slide the top panel away. (The panel should move about 7mm and a click will be heard).
-
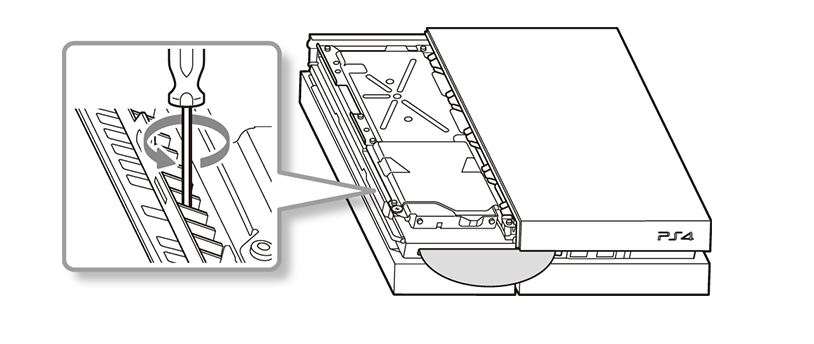
You'll now need to partially remove the HDD itself. You'll see a screw with the PlayStation symbols. Simply unscrew this counter-clockwise so you can move the HDD out of the way.
-
You should then see the manual eject screw as seen in the diagram below.
PS4 Slim and PS4 Pro
And if you bought a PS4 from late 2016 until today, you'll probably either have the PS4 Slim or PS4 Pro, which are quite easy to tell apart.
This is the easiest out of the batch to tighten.
-
Flip over your console and look for the circular hole directly above the PlayStation logo.
-
Insert your screwdriver here and turn.
Voilà!
Send it to Sony
As a last resort, this just might not be a problem that you can fix. In which case Sony will need to step in and take it from there. It's easy to put in a service request.
Bottom line
The absolute first things you should do are clean the disc and restart your console before you start to take it apart. If that doesn't solve the problem, then it's something that Sony may need to take care of.
Our pick
MagicFiber Microfiber cloth 6-pack
No scratches
Normal cloths or paper towels tend to be too rough and abrasive to clean the sensitive face of a disc. Instead, pick up a softer microfiber cloth to do so without risking any unnecessary scratches and damage.


0 Response to "You Can See More: Here's what to do when your PS4 won't accept a disc"
Post a Comment